
Greenhouse Job & Candidate Connection
In this article you will learn:
- The benefits of connecting Greenhouse & Relode
- How the Greenhouse + Relode Connector works
- How to setup your connection between Greenhouse & Relode
Benefits of the Greenhouse + Relode Connector
With this connection, Relode customers are able to automatically import jobs from Greenhouse into Relode, immediately receive submitted candidates from Relode into Greenhouse, and have candidate feedback from Greenhouse flow directly into. Enabling the Greenhouse connector saves time and reduces data entry. Review the Greenhouse & Relode overview to learn more about the benefits and best practices of using both Greenhouse and Relode.
How the Greenhouse + Relode Connector Works
Jobs
Once the connector is enabled, Relode automatically synchronizes all open jobs from Greenhouse for your organization. These jobs will initially appear in a pending status in your Relode client portal. Each job will have the following information from Greenhouse:
- Job title
- Job location
- Job’s Stages and Interview Plan
- Job’s Hiring Team
- Job’s Custom Field Info
- Job Post Location
- Job Post Description
- Job’s Openings
- Job’s Employment Type
- Job’s Questions
- Job Departments
- Job Offices
- Job’s Notes

- Review the Labor Market Insights, by selecting the Insights tab on the job
- Open the job to the Relode network of recruiters
To open the job to the network of recruiters, you will contact your Relode Job Manager to complete a job intake meeting.
Candidates
Once the connector is enable, submitted candidates from the Relode crowd of recruiters will be automatically added to your organization’s job in Greenhouse. These candidates will have the following information from Relode:
- Candidate contact information
- First name
- Last name
- Phone number
- Candidate’s Job Position
- Candidate’s Websites
- Resume
- Notes about the candidate including
- Career highlights
- Desired salary
- Answers to the Qualifications on the Job in Relode which could include:
- Certifications & Licenses
- Skills
- Education
- Languages
- Custom Questions
- Interview Availability
- Willingness to Relocate or Travel (if applicable)
- Availability to Start

As you process candidates from Relode in Greenhouse, your Relode Job Manager is automatically notified when one of the following 3 changes happen on the candidate profile in Greenhouse. Click here to walk through how to leverage Greenhouse features to maximize the connector with Relode.
- Stage changes in Greenhouse
- Scorecard is submitted & details associated with the scorecard
- Offer letter is sent and details associated with the offer
Real time feedback is critical to ensure the Relode recruiters stay engaged with your jobs. Providing feedback within 24-48 hours is recommended. To optimize your Greenhouse & Relode connector, it is recommended you:
- Follow the traditional hiring process for candidates: Screening > Interviews> Offer Letter
- If you go out of order, I.e. initiate an interview after sending an offer, this will limit the information that can be transferred to Relode automatically.
- Provide feedback on candidates by using the following features in Greenhouse:
Update the candidates Stage
If a candidate is Rejected - add the rejection reason and notes in Greenhouse

Track Interviews in Greenhouse and submit Scorecards
The following information from Greenhouse will automatically show in Relode:
- Scorecard submitted/updated
- Information includes:
- Interview Date and Time
- Date Updated
- Interviewer
- Interview Step in Stage
- Overall Recommendation
- Rating for Each Attribute in the Scorecard
- Questions in Scorecard (ex. Key takeaways)
- Information includes:
- Interview updates
- Information includes:
- Interview Date and Time
- Date Updated
- Status
- Location (if provided)
- Interview Name
- Organizer of Interview
- Interviewers
- URL of Interview (if provided)
Send Offer Letters through Greenhouse
The following information from Greenhouse will automatically show in Relode:
- Offer letter sent/updated
- Information includes:
- Date Updated
- Date Sent
- Start Date
- Status
- Custom Fields on Offer
- Information includes:

Setting up the Greenhouse + Relode Connector
To complete the setup steps you will need Administrator Access in Greenhouse. To enable the connector there are 3 quick steps for you to complete:
- Determine what user will be associated with Relode Candidates
- Enable the API Access in Greenhouse
- Add Relode as an Agency in Greenhouse
- Submit the Greenhouse setup form to Relode
The setup should take approximately 10 minutes.
Step 1: Decide what user in Greenhouse will be associated with all Relode Candidates
- Log into Greenhouse as an Administrator with Developer permissions
- Go to Settings in the upper right corner

- Click Users

- Find the user you are logged in as
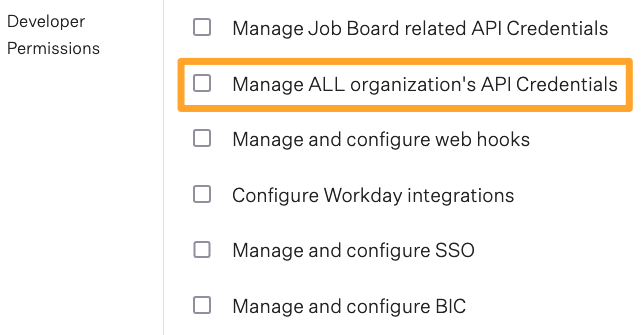
- Ensure they have this user permission selected Manage All organization's API Credentials
- Click Save
- Go back to the list of Users
- Decide which user you want associated with all candidates submitted from Relode
-
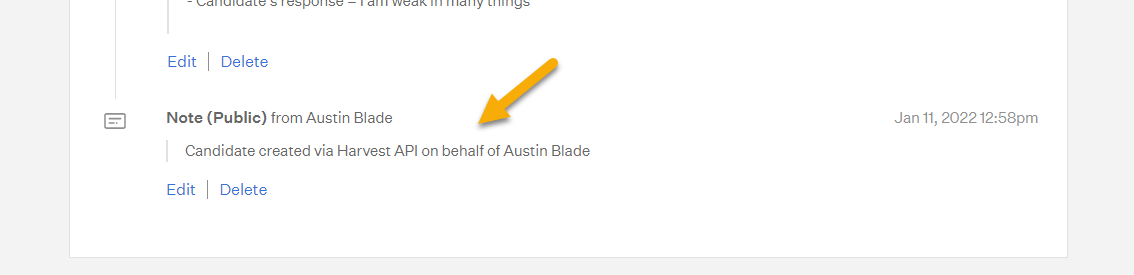
When candidates are created in Greenhouse from Relode, the candidate will show created via Harvest API on behalf of [the user you have chosen to associate with the API Connection]
-
Note: The user you select, must have Site Admin permission for the Greenhouse/Relode connector to work as desired.
-
- You can either choose an existing user or create a new user
- Existing user with Site Admin Permission
- Select the existing user
- New User
- Click the”‘+ New Users” button.
- Assign them Site Admin Permission
- Note: you may need to check off the “Never signed in only” to view this new user in the list.
- Existing user with Site Admin Permission
- Open the desired user
- Click the user’s name to be taken to the user’s details.
- Copy the User ID located in the URL
- Store the User ID in a secure location to provide to Relode

- Click the user’s name to be taken to the user’s details.
- Open a word document or a note, and Paste the user ID to save it
- You will need this key for Step 4


Step 2: Enable API Access in Greenhouse
- Log into Greenhouse as an Administrator
- Go to Settings in the upper right corner
- Click the Dev Center option in the Settings menu

- Click the API Credential Management link

- Click the Create New API Key button at the top of the page
- The Create new credential dialog box will appear
- In the API Type dropdown, select the Harvest option
- In the Partners dropdown, select the Relode option
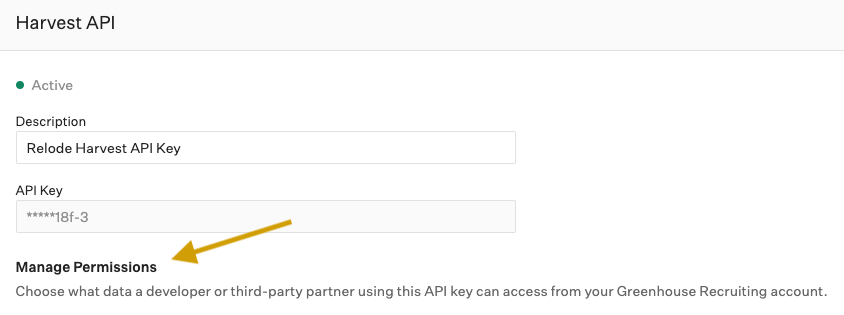
- In the Description box, enter the text Relode Harvest API Key
- Click the Create button to generate the new API key
- On successful creation, you will be presented with a new API key to copy

- Click Copy
- Open a word document or a note, and Paste the API key to save it
- You will need this key for Step 4
-
Note: You won’t be able to view the API key after clicking I have stored the API Key. If you lose your API key or need to access it later, you’ll need to generate a new key and provide it to Relode.
- Assign the correct permission to the Harvest API
- In the Manage Permissions Section select all of the following permissions
- All permissions should be checked for the following data:
- Applications
- Candidates
- Tags
- EEOC
- Scorecards
- Offer
- Scheduled Interviews
- Activity Feed
- Job Stages
- Rejection Reasons
- Sources
- Close Reasons
- Education
- Demographic Data
- The GET permissions in the following data:
- Users
- Departments
- Offices
- Custom Locations
- Jobs
- Job Posts
- Job Stages
- Job Openings
- Custom Fields
- Custom Field Options
- Approvals


- When you’re finished, click Save

- In the Manage Permissions Section select all of the following permissions


Step 3: Create Relode as an Agency in Greenhouse
- All candidates submitted by Relode will have Relode as their ‘source’
- To set this up: Go to the three dots at the top and click “Sourcing”
- If Relode is not already set up as an Agency, click the Add Agency button to add Relode
- Name: Relode
- Click Create Agency

Step 4: Submit the Connector Information to Relode
Once you are ready for the connector to be enabled, submit this form to the Relode team.
- Your Greenhouse + Relode connector will be enabled within 3 business days of submitting your information
- You will need the following information to submit the form
- The information gathered in step 1 & 2
- The user ID of the Greenhouse user who will have Relode candidates associated with them
- The API Key from Greenhouse
- A default status for all Relode candidates to be created with
- The information gathered in step 1 & 2